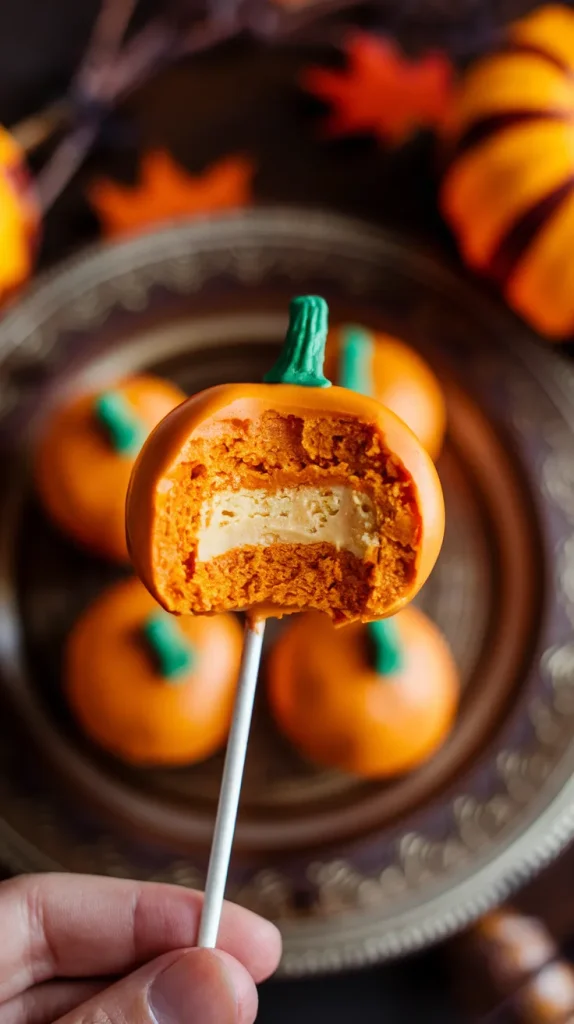
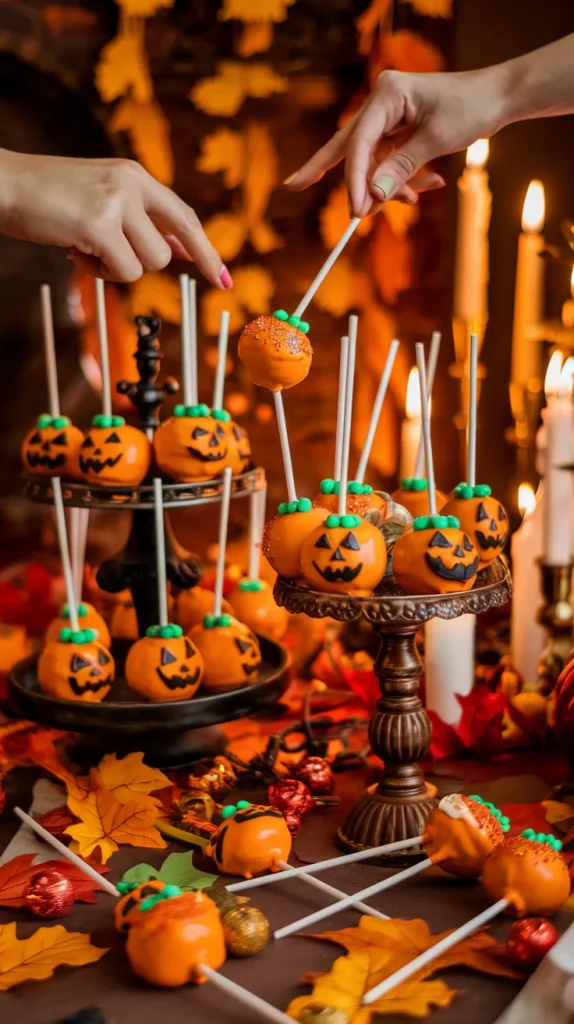
🎃 Fun & Festive Pumpkin Cake Pops for Fall Parties
Let’s be honest—fall baking is all fun and games until you realize you’ve dirtied every mixing bowl in your kitchen. But don’t panic! These Pumpkin Cake Pops are the low-stress, high-reward kind of treat that looks fancy but takes minimal effort. 🍂
They’re bite-sized, adorable, and dangerously addictive—like the pumpkin-spiced version of cake you can eat without a fork (or shame). Perfect for parties, bake sales, or when you just want to show off your “Pinterest Mom” skills without actually being one.
Why This Recipe is Awesome
Because who doesn’t love desserts on a stick? These pumpkin cake pops are moist, sweet, and covered in creamy chocolate, which basically makes them tiny edible happiness bombs. They’re festive without being fussy, and honestly? They’re so easy, it feels illegal.
Why you’ll love them:
- They’re super customizable—decorate cute or spooky, depending on your vibe.
- They travel well (no frosting smudges = party win).
- And FYI, they’re way cheaper than buying from a bakery.
Course: Dessert
Cuisine: American (but make it fall-core)
Difficulty: Easy—aka foolproof.
Servings: About 20 cake pops
Prep Time: 25 minutes
Cooking Time: 30 minutes
Calories: Around 120 per pop (worth every one)
Total Time: About 1 hour (plus chilling time for the impatient souls)
Ingredients You’ll Need
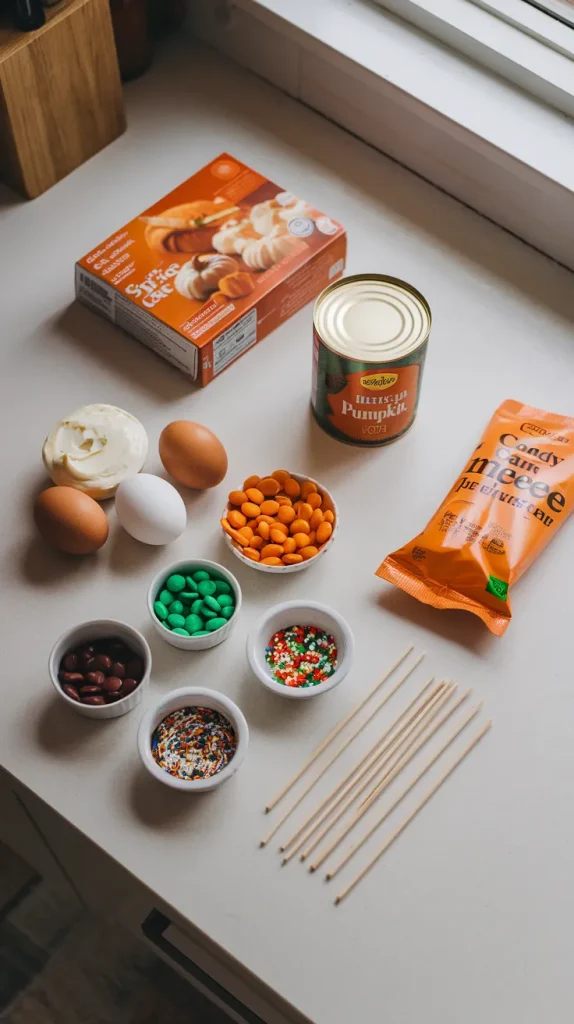
Get ready to feel like a baking boss (with only 8 ingredients!).
- 1 box of spice cake mix – or any cake mix you love; we’re not judging.
- 1 cup pumpkin puree – not pumpkin pie filling, unless you enjoy chaos.
- 2 large eggs – the glue that keeps your masterpiece together.
- ½ cup vegetable oil – for that perfect moist texture.
- ½ cup cream cheese frosting – store-bought or homemade, whatever your mood allows.
- 12 oz orange candy melts – your pumpkin coating.
- Mini green M&Ms or green fondant – for the “stems.”
- Lollipop sticks – obviously, or else these are just “cake balls.”
Optional but highly recommended:
- Sprinkles or edible glitter – because subtlety is overrated.
- White or black chocolate melts – for drizzling or spooky jack-o’-lantern faces.
Step-by-Step Instructions
Alright, apron on, playlist ready—let’s get to it.
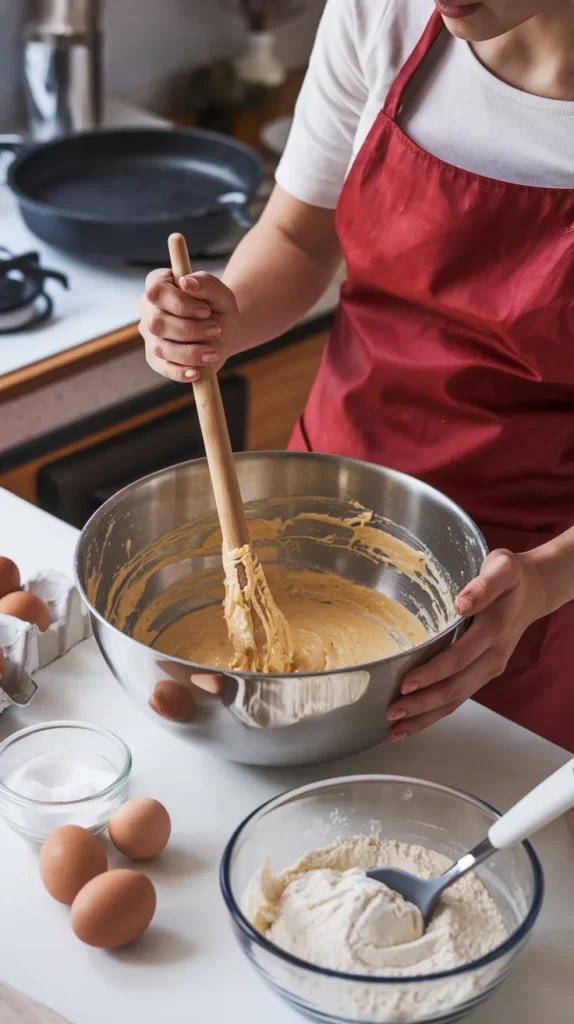
1. Bake the cake.
Preheat your oven to 350°F (175°C). Mix the cake mix, pumpkin puree, eggs, and oil until smooth. Pour into a greased baking dish and bake for 25–30 minutes, or until a toothpick comes out clean.
2. Crumble it up.
Once cooled (don’t burn your hands in excitement), crumble the cake into fine crumbs. You’re basically destroying your hard work—but trust the process.
3. Add frosting.
Mix in the cream cheese frosting until it forms a dough-like texture. You want it sticky enough to hold shape but not so soft it collapses. If it’s too wet, add more cake crumbs.
4. Roll into balls.
Scoop and roll into 1-inch balls—somewhere between “bite-sized” and “I’ll-just-have-one-more.” Place them on a baking sheet lined with parchment paper.
5. Chill.
Refrigerate for at least 30 minutes (or 15 if you’re impatient). This step is crucial so they don’t slide off the sticks later.
6. Insert sticks.
Melt a little of your candy melts, dip the tip of each stick into it, then insert halfway into a cake ball. This acts like edible glue.
7. Dip and decorate!
Melt the rest of your orange candy melts in a microwave-safe bowl (30-second bursts, stir between each). Dip each cake pop in, gently tapping off excess coating. Stick them upright in a styrofoam block or cake pop stand to dry.
8. Add stems and details.
While the coating is still soft, press a green M&M or fondant piece on top for the “pumpkin stem.” Once set, drizzle with melted white or black chocolate for extra flair—or paint on tiny jack-o’-lantern faces if you’re feeling fancy.
9. Let them set.
Pop them in the fridge for 15 minutes to firm up. And voila—adorable little pumpkins that’ll make your guests think you spent hours in the kitchen. (We won’t tell them otherwise.)
Common Mistakes to Avoid
Look, we’ve all been there. Let’s save you from the usual cake pop disasters.
- Skipping the chill time: The pops will fall apart faster than your willpower at a dessert table. Chill = structure.
- Using too much frosting: This makes them mushy and hard to coat. Less is more, my friend.
- Overheating the candy melts: Burnt candy smells like sadness. Microwave in short bursts.
- Forgetting to tap off excess coating: Otherwise, you’ll get drips, lumps, and that sad “Pinterest fail” energy.
- Trying to decorate before they set: You’ll end up smudging everything. Be patient—it’s worth it.
Alternatives & Substitutions
Because sometimes the grocery store doesn’t cooperate (or you’re just improvising).
- No spice cake mix? Use vanilla and add 2 tsp pumpkin pie spice. Same cozy flavor, different path.
- No candy melts? Use white chocolate with a drop of orange gel food coloring. (Avoid liquid dye—it messes up the texture.)
- Dairy-free version: Use vegan frosting and plant-based white chocolate. Still delish.
- No sticks? Make pumpkin cake truffles instead. Just roll, coat, and serve in mini cupcake liners.
- Want to be extra? Add a pinch of cinnamon or maple extract to your frosting—it takes the flavor up a notch.
Pro tip: Match your decorations to your party theme. Go cute (pastel pumpkins), scary (jack-o’-lantern faces), or glam (gold glitter). The limit does not exist.
FAQ (Frequently Asked Questions)
Q1: Can I use homemade cake instead of a mix?
Absolutely! Any pumpkin or vanilla cake works—just make sure it’s moist enough to crumble well.
Q2: How do I keep the sticks from falling out?
Dip the tip of each stick in melted candy before inserting. It hardens like glue and keeps your pops standing tall.
Q3: Can I freeze pumpkin cake pops?
Yes! Wrap individually in plastic wrap and freeze for up to 2 months. Just thaw in the fridge before serving.
Q4: How far in advance can I make these?
You can prep the cake balls a day before dipping. Once coated, they’ll stay fresh in the fridge for about 5 days (if they last that long).
Q5: Can I skip the frosting?
Technically yes, but your pops will be dry and sad. The frosting gives that smooth, fudgy texture we all love.
Q6: How do I make the coating extra smooth?
Add a teaspoon of coconut oil or shortening to your melted candy—it helps with shine and flow.
Q7: Can I make them Halloween-themed?
Yes! Use black and purple candy melts for spooky vibes, or add candy eyes for “monster pumpkins.” Cute and creepy. 👀
Final Thoughts
And there you have it—Fun & Festive Pumpkin Cake Pops that are adorable, party-ready, and guaranteed to disappear faster than Halloween candy. 🎃
They’re bite-sized, portable, and way more fun than regular cake (fight me on this). Whether you’re hosting a fall gathering, baking with kids, or just need an excuse to melt chocolate, these little pops deliver big fall energy in every bite.
So go ahead—channel your inner fall fairy, grab your sticks, and make some magic. You’ve officially mastered the art of dessert-on-a-stick. 🍰✨
Now the only question is… how many cake pops is too many? (Trick question. The limit doesn’t exist.)