🎃 Halloween Sugar Cookies Decorated (Royal Icing Tutorial)
So you’ve decided to make Halloween cookies — and not just any cookies, but the kind that actually look like they belong on Pinterest. Bold move. 😏
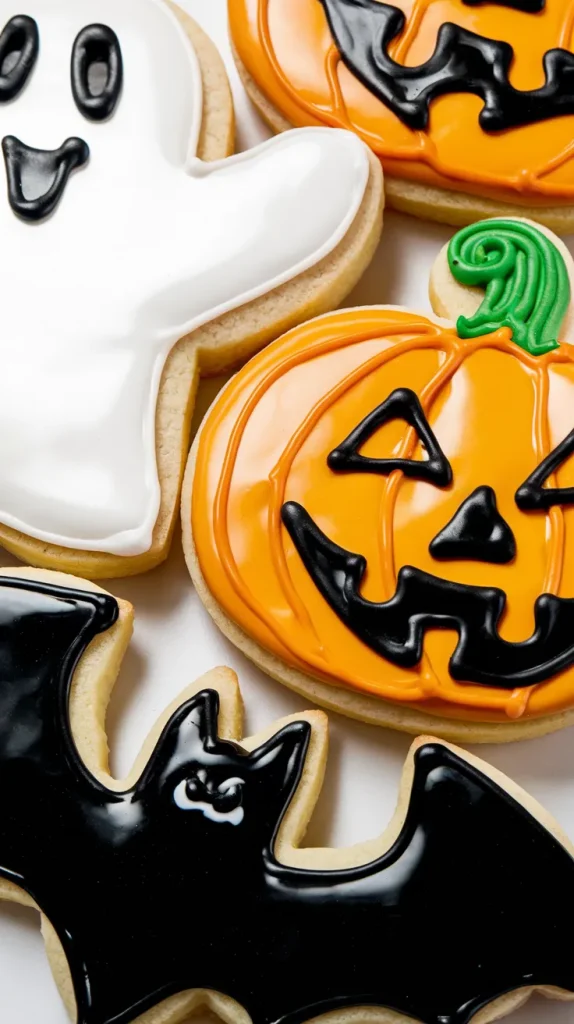
These Halloween Sugar Cookies are soft, buttery, and melt-in-your-mouth delicious, but let’s be honest — the real showstopper is the royal icing. It’s glossy, smooth, and ready for all your spooky designs: ghosts, pumpkins, bats, witches, black cats — basically, your edible art gallery.
Even if your hand shakes a little (thanks caffeine), don’t stress — we’re keeping this tutorial fun, forgiving, and beginner-friendly. You’ll end up with cookies so cute, you’ll have a hard time eating them. (But let’s be real, you’ll still eat them.) 🍪👻
Why This Recipe is Awesome
Because it’s the perfect combo of cute and delicious — not just pretty cookies that taste like cardboard (we’ve all been there). These sugar cookies are buttery, soft, and hold their shape beautifully for decorating.
Plus, the royal icing part? Not nearly as scary as it sounds. Once you get the hang of it, you’ll be decorating like a Halloween bakery pro — without the stress or mess of 15 different piping tips.
Course: Dessert (or breakfast, I don’t judge)
Cuisine: American (with a spooky twist)
Difficulty: Easy–Medium (depends on how artistic you’re feeling)
Servings: About 24 cookies
Prep time: 25 minutes
Cooking time: 10–12 minutes
Calories: Around 140 per cookie
Total time: About 1 hour (plus icing dry time)
Why it rocks: It’s foolproof, totally customizable, and makes your kitchen smell like a butter-sugar dream.
Ingredients You’ll Need
For the Sugar Cookies:
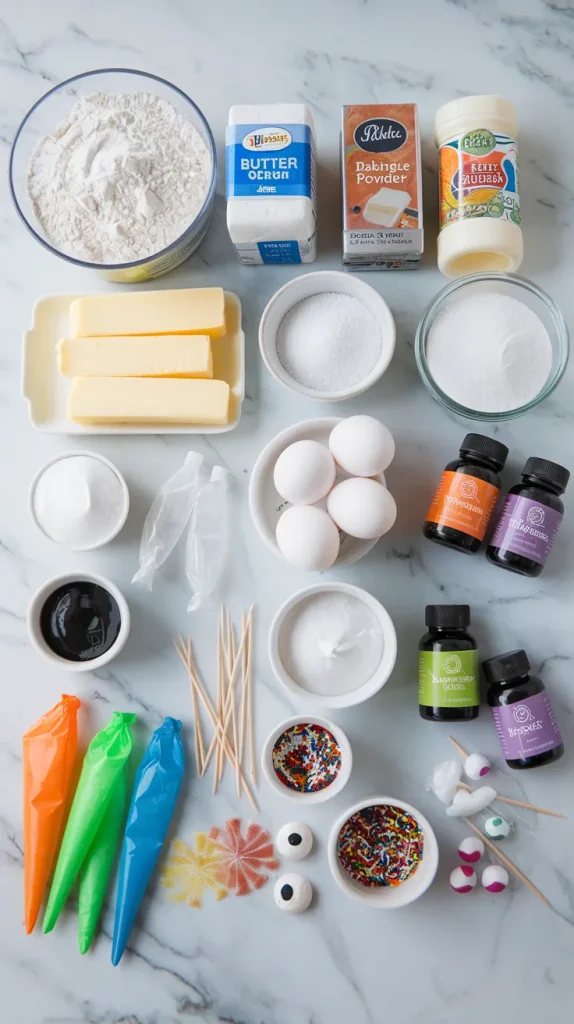
- 2 ¾ cups all-purpose flour – your cookie canvas.
- 1 tsp baking powder – gives a gentle lift.
- ½ tsp salt – because even cookies need balance.
- 1 cup (2 sticks) unsalted butter, softened – room temp, not melted, not cold.
- 1 cup sugar – sweet but not overkill.
- 1 large egg – the binder that keeps it all together.
- 2 tsp vanilla extract – or swap one teaspoon for almond extract if you’re feeling fancy.
For the Royal Icing:
- 3 cups powdered sugar – no lumps, please.
- 2 tbsp meringue powder – the secret to icing magic.
- 4–5 tbsp water – add slowly until you hit your desired consistency.
- Gel food coloring – orange, black, green, purple… basically your Halloween starter pack.
Decoration Gear (Optional but fun):
- Piping bags or zip-top bags
- Toothpicks (for detail work and popping bubbles)
- Sprinkles, edible glitter, candy eyes, etc.
Step-by-Step Instructions
Okay, it’s cookie o’clock. Let’s make these spooktacular.
1. Mix the dry ingredients.
Whisk flour, baking powder, and salt in a medium bowl. Set aside while you handle the butter situation.
2. Cream the butter and sugar.
Beat butter and sugar together until light and fluffy — about 2 minutes. Add egg and vanilla, and keep mixing until it’s creamy and smooth.
3. Combine wet and dry.
Gradually add the dry mixture to your butter mix. Stir until you get a soft dough that doesn’t stick to your hands. If it’s too sticky, chill it for 10 minutes.
4. Roll and cut.
Roll dough out on a floured surface until it’s about ¼-inch thick. Cut out shapes using Halloween cookie cutters — ghosts, bats, pumpkins, tombstones, whatever gives you spooky joy.
5. Bake.
Transfer cookies to a parchment-lined baking sheet and bake at 350°F (175°C) for 10–12 minutes, or until the edges just start to turn golden.
6. Cool completely.
This is crucial. If you try to ice warm cookies, you’ll end up with a sugary puddle instead of art.
7. Make the royal icing.
Whisk powdered sugar and meringue powder in a bowl. Slowly add water until the icing forms soft peaks. For outlining, you want it thicker; for flooding (filling in), add a little more water to thin it out.
8. Color the icing.
Divide icing into bowls and tint with gel food coloring. Stick with Halloween shades — pumpkin orange, spooky black, witchy green, and ghostly white.
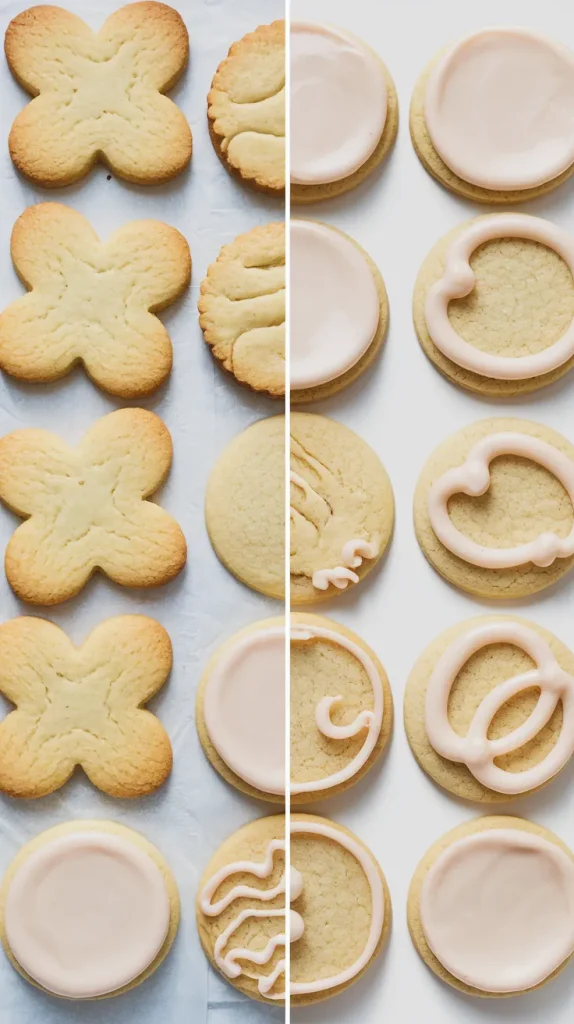
9. Decorate like a pro.
- Outline your cookie shapes first.
- Let outlines set for 5–10 minutes.
- Fill in (“flood”) the inside with thinner icing.
- Use a toothpick to spread and pop any bubbles.
- Add details like spiderwebs, eyeballs, or stitches.
10. Dry completely.
Let cookies sit uncovered for 6–8 hours (or overnight) until icing is firm to the touch. Patience = perfection.
Pro tip: Don’t refrigerate them — humidity messes with royal icing. Just store at room temp in an airtight container.
Common Mistakes to Avoid
Learn from my (many) icing fails:
- Skipping the chill: Warm dough spreads like gossip. Chill it if it feels too soft.
- Overbaking: These cookies should stay pale — crispy edges are fine, but no golden brown.
- Icing too runny: If your royal icing flows off the edge, you’ve gone too far. Add more sugar to thicken it.
- Not letting layers dry: If you rush, details bleed together like a melted horror movie.
- Using liquid food coloring: Gel coloring is key — liquid adds too much water and ruins consistency.
Bonus tip: Practice a few designs on parchment before going all-in on your cookies. It’s like sketching before painting… only tastier.
Alternatives & Substitutions
Because creativity (and chaos) is half the fun:
- No meringue powder? Use 2 egg whites instead, but skip raw eggs if kids are eating.
- Gluten-free version: Use a 1:1 GF flour blend — these cookies handle it like champs.
- Flavor upgrades: Add a touch of cinnamon, pumpkin spice, or orange zest for that fall flavor boost.
- Lazy decorator hack: Skip royal icing entirely and use colored buttercream or melted white chocolate. Still cute. Still delicious.
- Need a shortcut? Use store-bought sugar cookie dough — just roll, bake, and spend your energy on decorating.
Pro opinion: A mix of homemade and store-bought never hurt anyone. The point is to have fun (and eat cookies). 🍪
FAQ (Frequently Asked Questions)
Q1: Can I make the dough ahead of time?
Absolutely! Wrap it tightly and refrigerate for up to 3 days, or freeze for a month. Let it soften slightly before rolling.
Q2: How long do these cookies last?
They stay fresh for about a week at room temp in an airtight container — though good luck keeping them around that long.
Q3: Can I freeze decorated cookies?
You can, but the icing can lose its shine. If freezing, layer them between parchment and defrost at room temperature.
Q4: Can I skip meringue powder?
Technically yes, but meringue powder is what gives royal icing its glossy, smooth finish. Without it, you’ll get more of a glaze.
Q5: What’s the difference between outlining and flooding icing?
Outlining = thick icing for borders. Flooding = thinner icing to fill the cookie. Think of it as the “paint-by-numbers” of baking.
Q6: Can I use buttercream instead?
Sure, but it won’t harden like royal icing — it’s more of a soft, fluffy vibe. Perfect if you want cookies that melt, not crunch.
Q7: My icing looks dull — what happened?
Humidity or overmixing can ruin the shine. Try letting them dry in a cool, dry place and don’t overwork the icing.
Final Thoughts
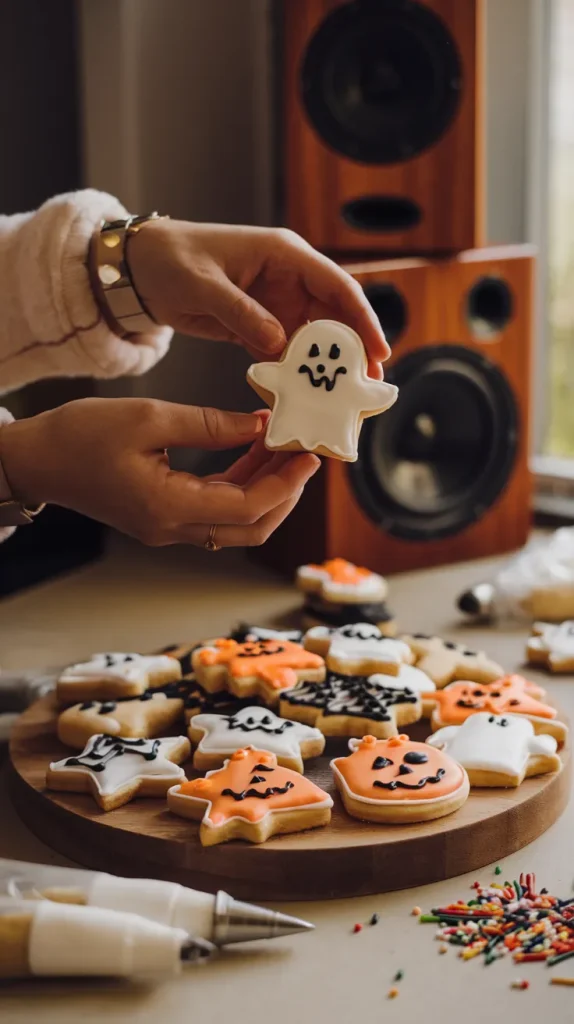
And there you have it — Halloween Sugar Cookies with Royal Icing that are spooky, sweet, and way too fun to make. 🍬🕸️
Whether you go minimalist with ghosts or full Van Gogh with haunted houses, these cookies are all about creativity (and snacks). So don’t worry if your spiderweb looks more like spaghetti — it’s Halloween; imperfection is part of the charm. 😜
Now grab your piping bag, blast some “Monster Mash,” and make your kitchen smell like butter and sugar heaven. Because honestly? Cute cookies make everything better — especially when they scream Halloween. 🎃🍪